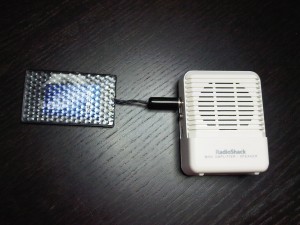
Sitting around all day with a torn AC joint in your left shoulder will make you crazy. With limited mobility, I decided to distract myself by re-building a childhood project that still fascinates me today. By connecting a simple solar cell to a basic audio amplifier, you can eavesdrop on light sources!
One of the best gadgets I had when I was a kid was the Radio Shack audio amplifier. I was hooking that thing up to all kinds of crazy circuits and things. At the time, small hand held laser pointers were relatively new and after blinding neighbors and exhausting the cat, I wanted to see if I could bounce the beam off of a window and hear what was going on… a concept that wasn’t new at the time, but I thought I was a genius for “discovering”. Unfortunately at 14 years of age I didn’t fully grasp how to do it, so I started out by connecting a solar panel to my trusty audio amp. Obviously I wasn’t able to get the laser microphone to work with only a solar panel, but I did discover I could listen in on other light sources.
If you want to build one of these light listening devices, the steps are very simple to follow.
Parts List
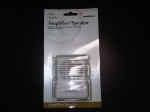 |
$14.99 Radio Shack Audio Amplifier Part # 277-1008C |
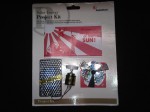 |
$13.99 Radio Shack Solar Motor Kit Part # 277-1201 |
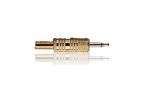 |
$3.99 Mono 1/8″ Plug Part # 274-868 |
You’re also going to need a soldering iron, some solder, and if you want you can get some small diameter heat-shrink tube and dig up a heat-gun or very hot hair dryer.
Start Building
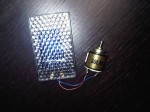 First you open the solar motor kit and play with it for a bit. Get your fifteen bucks worth because we’re going to tear it apart to make the light listening device. Of course if you already have a solar cell available, you don’t have to buy the solar motor kit just to tear it apart.
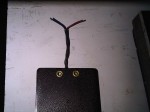 Once you have the kit open, cut the solar cell from the solar motor, leaving as much wire attached to the solar panel as possible. You can throw out the motor or toss it into your ever growing collection of miscellaneous parts you’ve scavenged. If you want to protect the leads using heat-shrink, now is the time to do it. Cut off just enough to leave about 3/4 of an inch of wire sticking out the end, slide the tubing over the wires, and blast it with your heat gun or hair dryer on the hottest setting. The tubing should shrink around the wires, protecting them and giving them a little bit better resiliency in the process.
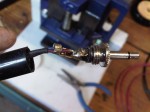 Now take out your 1/8″ mono audio plug. I didn’t use the gold plug given in the parts list because I had plenty of options in my own collection of miscellaneous parts I’ve scavenged. Heat up your soldering iron, but make sure you slide the plug’s outer housing over the wires before you start soldering. I don’t know how many times I’ve finished soldering wires to a plug or jack or something, only to turn around and realize I didn’t put the housing on first. But, my personal incompetence aside, solder the wires to the 1/8″ mono plug. There is no polarity to worry about here, but the accepted standard is you connect the negative lead (black/blue wire) to the outer conductor and the positive lead to the inner conductor, or “tip”.
Once you’re done soldering, screw on the plug’s outer housing and connect it to the audio amplifier’s input jack. You should now have something like this in front of you! Turn on the audio amp and start listening!
I couldn’t find my regular video camera, so I had to settle for my older digital still camera “that also takes video!”. The quality is crap, but you get the idea. In this video I demonstrate what an LED based flashlight, an incandescent flashlight, and a laser pointer sound like.
Other fun light sources to listen to are candles, car headlights, fireflies, CRT monitors, infrared remote controls, pulse width modulated light sources (LED lights that fade in and out on computers and equipment)… just about anything that emits light! As always, it’s more fun when family members get involved with the project! And yes, I do have a cat bed on my work desk. If I didn’t, she’d lay down right on the keyboard!


