 Last summer I posted about the possibility of using outside air to cool a datacenter. Soon after posting I set about building a proof of concept.
I also started noticing a trend leaning toward things like increasing the baseline temp target in datacenters:
Raise the temperature, fight the fans
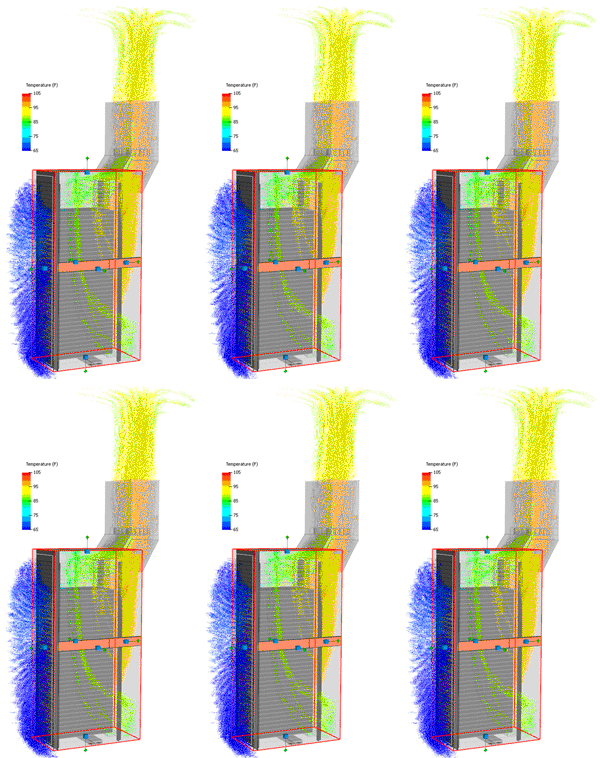
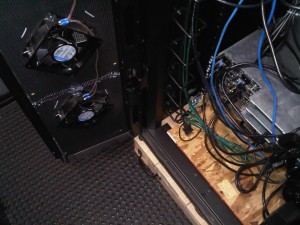
I even found a commercial rack (pictured) that had airflow management similar to the one I was building… but I already started modding the APC NetShelter I had before finding it. I also think modding the NetShelter actually cost less than buying the WrightLine rack anyway.
The location
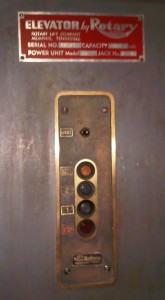 The first thing I had to do was find a suitable location that was small, cheap, and allow for interesting modifications… yet have adequate facilities (power/pipe) for setting up a backup-class mini-datacenter. What I found was a local building on main street that had access to the municipal fiber optic loop… and it had a broken 1920s freight elevator.
The building and elevator shaft are two stories high, with the elevator permanently stuck in the basement. That setup makes for a pretty good air guide, letting cool basement air flow through the rack and naturally rise up the shaft. Also, the elevator was really nothing more than a big steel box inside a steel cage, so it was really perfect for the project.
The only problem was the old style wood slat gates. Physical security was and still is a concern… however the entire basement is a restricted access area and I’ve got plenty of secondary security (enhanced rack locks), cameras, alarms (gate, motion, rack door, etc.), and environmental monitoring going on that I feel comfortable enough at this point that the area is secure enough for its intended purpose.
Preparing the space
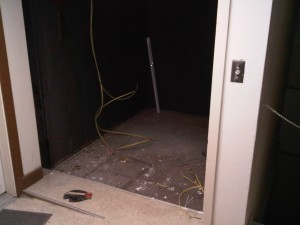
The first thing that needed to happen was a clean out and re-painting of the elevator itself. In the end I had to take a wire wheel to the entire steel floor and bottom of the steel panel walls to get the old paint and rust off. I applied a generous coating of oddly enough, rust colored primer, then three coats of flat black rustoleum enamel. This whole process took a week and a half to finish.
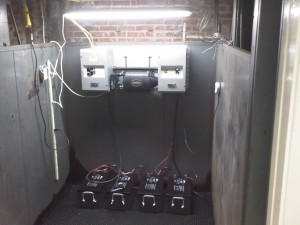
Then came the 40A power drop and fiber optic feed. For power backup I chose to “eat my own dog food” so to speak and went with one of my employer’s power systems instead of a typical UPS. The racking and breaker system I bought for this setup can handle two inverters, however since a single OutBack Power inverter can handle 3.6KW (~30A @ 120v), I only needed to install one inverter at this location. The other inverter is in my garage providing back up power to my gas heating system (ignitor & fan), gas hot water heater (ignitor), and refrigerator… something I’m grateful for already this winter as we’ve had several power outages recently.
Some people asked me why I wasn’t just going with a standard rackmount UPS. While installing a 3000va UPS from APC isn’t that expensive or difficult, tying enough battery power and charger capacity to that UPS to get the same amount of run-time definitely is. But, the final and best reason I went with an OutBack setup is the fact that I can install some solar panels and a charge controller later on to help extend run-time during a power outage and offset power usage in the datacenter the rest of the time.
Even though OutBack specifically states their systems are not designed to be used as a UPS, these inverters have been used to keep computers and servers running in the event of grid failure all over the world. As Director of IT for OutBack, I even run our primary on-premise datacenter on a dual-stack FW500 system.
The batteries I bought for this project will run a rack full of gear for around 4 hours, which is a very rare situation on main street. I considered buying a second string of batteries to boost me to 8 hours, or even getting a DC generator to act as a long-term backup solution, but I discovered that the city’s fiber routers are on simple UPS boxes and would not last more than 4 hours themselves, so it would be pointless.
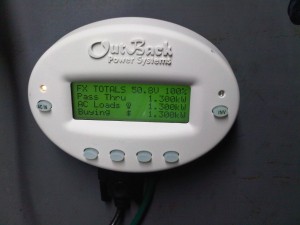
You can interact with the OutBack inverter and get a real-time data feed via RS232 serial using a monitoring device called a Mate. This Mate is mounted to the side of the elevator shaft and its COM port is connected to a USB to Serial adapter, which is then connected to a KeySpan USB server. That setup allows me to easily pull serial data from the Mate into any system anywhere on my VPN, even at home. For now though the data feed is used by an administrative system that monitors the rack’s environment (temp/humidity) and can gracefully initiate a shutdown of the entire rack in the event of an extended power outage.
Preparing the rack
The APC NetShelter rack I already had was going to the testbed in this little venture. Because there would be no air system of any kind in this dusty basement, I had to protect the servers in my rack against both heat and dust. To that end, I set about building air filters into the rack door.
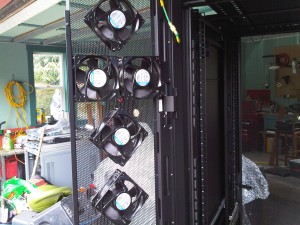
On the rear doors I secured 16 12v DC brushless fans (8 per door). These fans are great because they can be run at a very quiet low speed using only 5v, and can be ramped up to full speed at 12v based on temperature inside the rack.
Then I sealed up the rear door mesh with some thin foam rubber I picked up at a craft store. The purpose of this is to ensure that all the hot air coming from the servers is moved through the fans and not leaked out the mesh doors. Normally this wouldn’t matter, however by doing this I can retain 100% control over the hot air exhausting out the back of the rack and duct it out if I so chose. The important thing is to ensure the hot air does not swirl around in the elevator and re-enter the front of the rack.
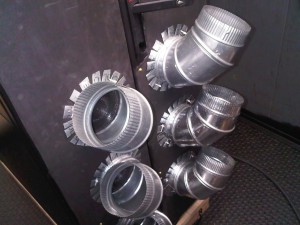
Upon testing, the fans simply made warm air circulate around in the elevator, which was not what I wanted. To help the hot air “naturally” rise up the elevator shaft and out through the massive exhaust fan at the top, I added 90° elbow ducts and slightly angled them so they wouldn’t blow into the back of each other. I think it gives the rack a nice “race car” feel, don’t you?
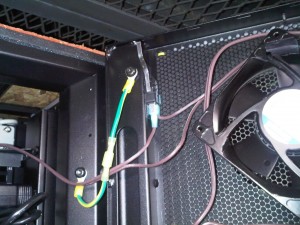
Other features are just nice, like lever switches on each rear door that turn the fans off when I open them. With the power of 8 6″ fans per door, these switches keep the doors from literally thrusting themselves closed on me and chewing up my shirt in the fan blades.
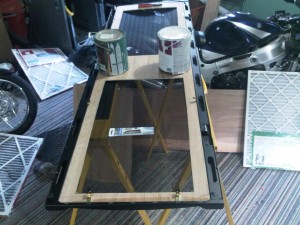
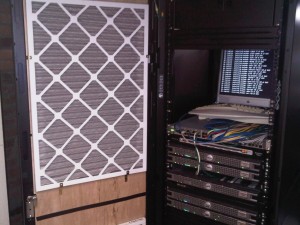
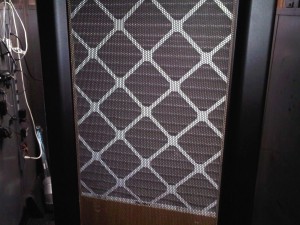
The air filters slid tightly into place in the front door, allowing only clean air through to the servers in the rack. After running freshly cleaned servers in this rack for three months, I can safely say I’ve seen more dirt on the front bezels of servers in professional colocation facilities than I’ve seen on the servers in this rack. I can’t find a speck of dust anywhere.
Other prep work included cutting and securing plywood to the top and bottom of the rack to seal it, installing air dam blanks in the front of the rack to help direct air, and using weather stripping and duct tape around the door perimeter to seal the whole thing up.
Heat sinks
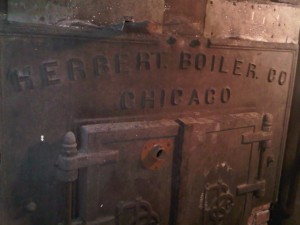
The great thing about this setup are the two massive broken down iron boilers in the basement. They are sunk into the ground fairly well and all the air coming into the basement from the alley vent must flow around them before reaching the freight elevator. They act like giant geothermal heat sinks in the summer, and may actually warm the air a little in the winter when it gets down below freezing outside.
Temperature Data
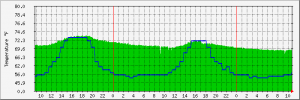
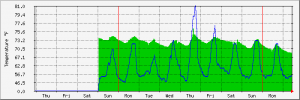
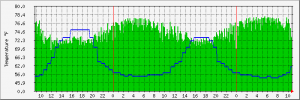
I’ve setup MRTG to log data from the environmental monitor sensors in the rack as well as the local weather station RSS feed. The green data comes from the rack while the blue line comes from the external weather station. While I wasn’t able to get this project finished in time to test during this summer’s record breaking heatwave, rest assured next summer I will be keeping a close eye on the weather and posting any additional data.
The short blip in the green data feed from the rack was when I had to open the rear doors to change out some cables. You can see with the rear fans turned off that the temperature spikes at the front of the rack where the sensors are located.
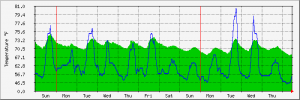
For comparison I took data for the same day from an air conditioned server room in a nearby town. Notice how the passively cooled rack actually stays cooler than the air conditioned rack pulling 20A on the AC unit? You will also notice a much smoother temperature progression on the passively cooled rack instead of the jagged up and down cycling of the AC cooled equipment. I wonder if the thermal stress an AC unit introduces plays any role in hardware failure?
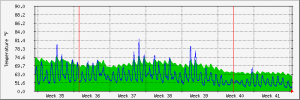
Later that month there were a couple temperature spikes up into the 80s outside, but thanks to those boilers and the basement’s concrete foundation, the rack stayed perfectly cool.
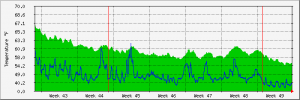
Between 09/12/2009 and 10/12/2009, the external temperature jumped over 75°F, while the rack’s intake temperature stayed below 75°F.
Looking at today’s data, it shows the servers in the passively cooled rack are getting too cold. According to Google’s recent paper regarding disk failures in their server rooms, systems operating at 59°F had a higher disk failure rate than those running at 122°F. Obviously, with temperatures outside now reaching below 32°F, the intake temperature of my experimental rack appears to be getting dangerously low.
I think this can be solved by installing a simple high/low temperature controlled switch that will let the 12v fans run at low speed on 5v when it’s cold outside, then kick back up to full high speed at 12v when the temperature starts creeping up.
Success
So far I feel this project has been a great success. I will continue to keep an eye on the temperature and air flow through the filters and tweak things as necessary.



[…] project makes my little passively cooled datacenter project look like amateur-hour (ok, it looked like that before). The entire building was built for 20M$ […]